File Into Existing Docket
Use File into Existing Docket to submit new documents or pleadings into a docket that already exists. This keeps every filing for a docket together under the correct docket record.
Tier 2 users who are signed in to the portal.
Have these ready:
- The docket number of the existing docket.
- The parties you are filing for, and whether they are already registered in the system.
- The documents to upload. At least one file is required.
Open the Form
-
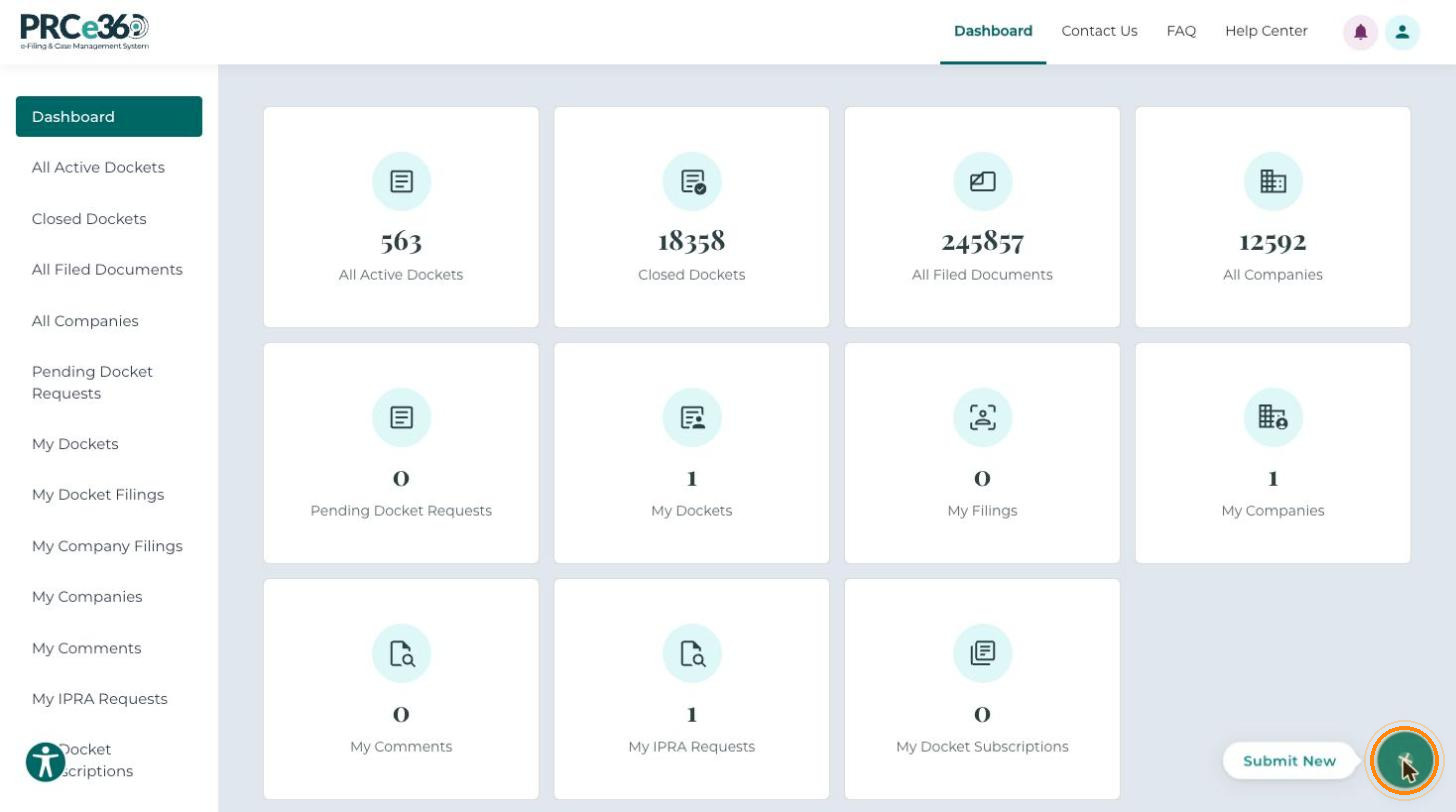
On your Dashboard, click Submit New at the bottom right of the screen.
-
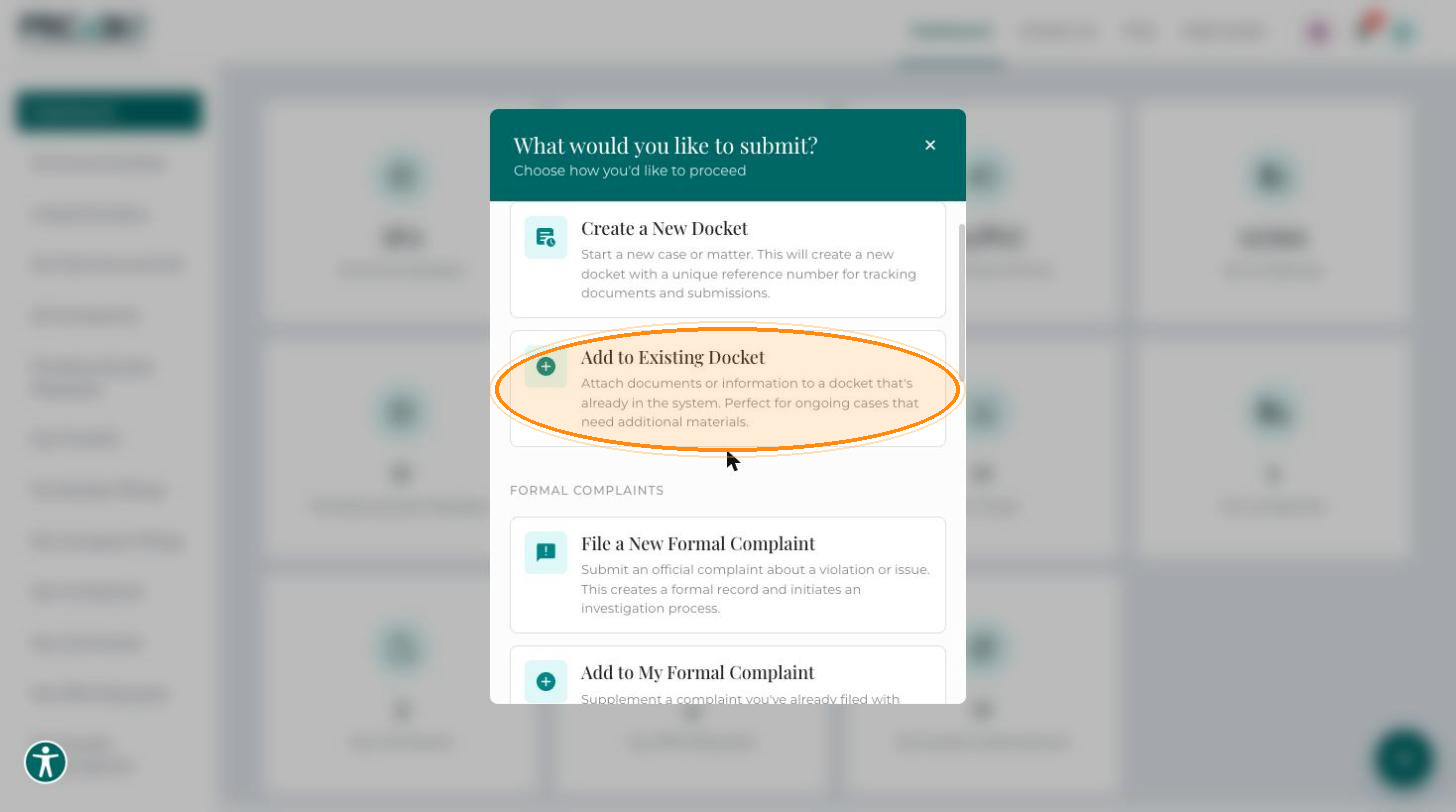
In the What would you like to submit? pop-up, under Docket Management, select Add to Existing Docket.
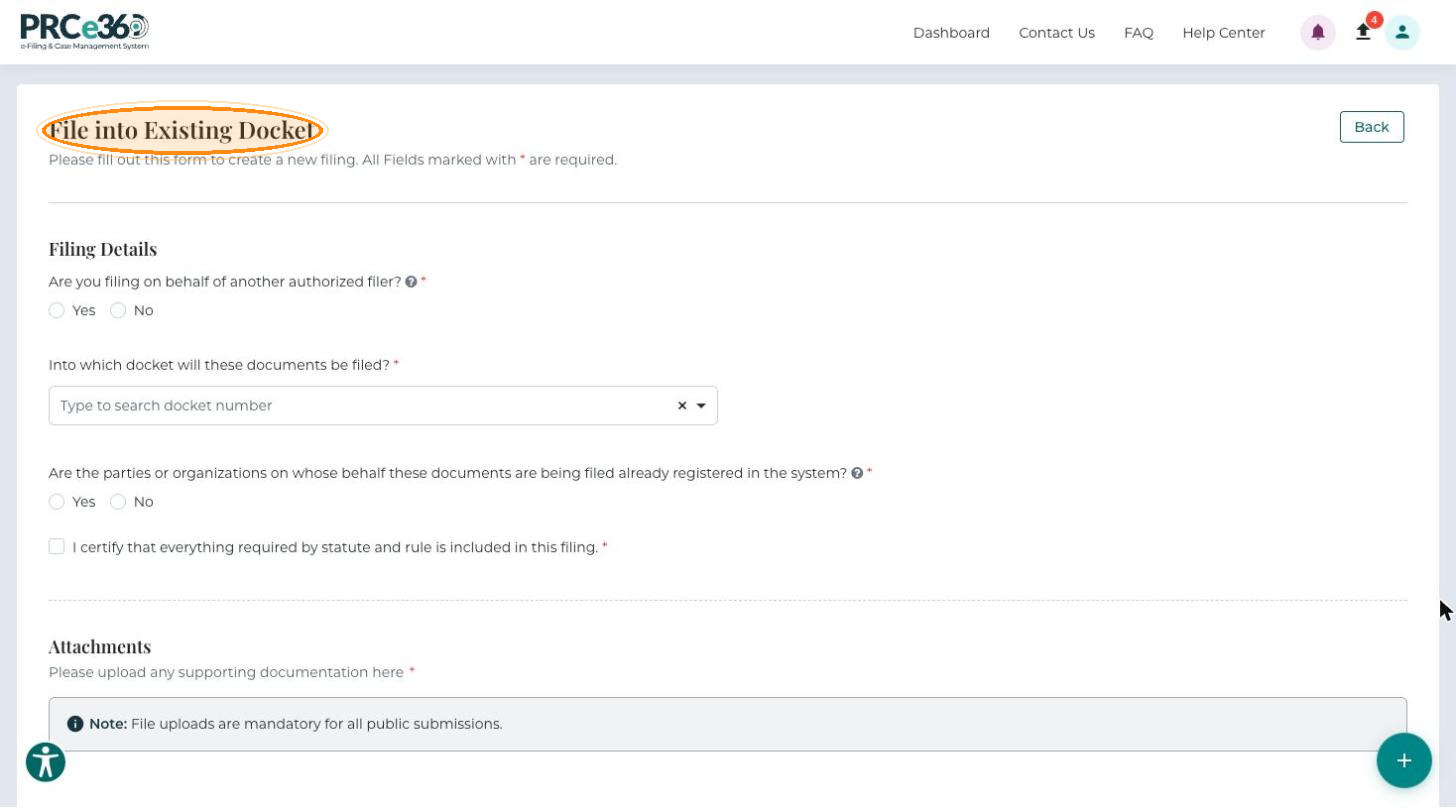
The File into Existing Docket form opens. All fields marked with * are required.
Filing Details
-
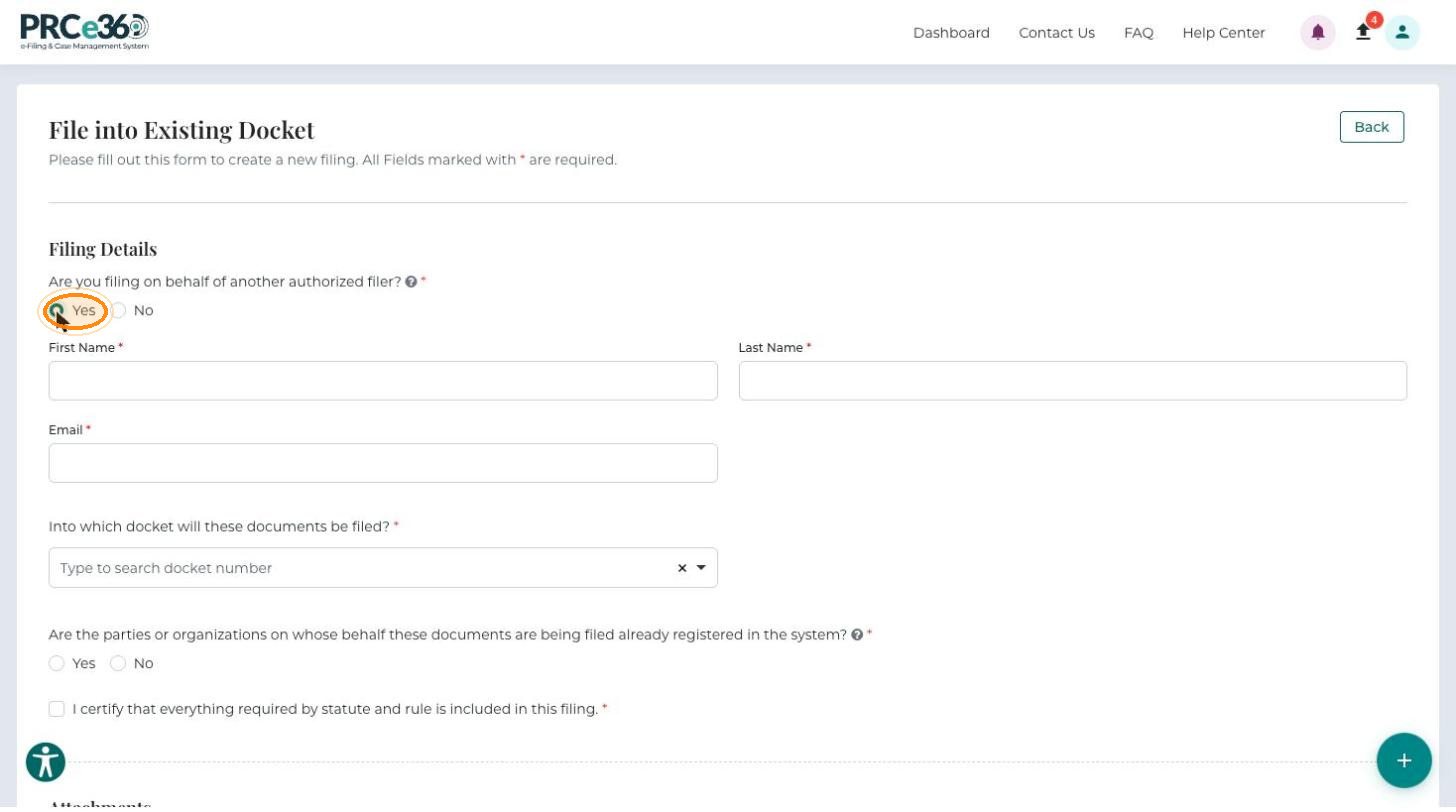
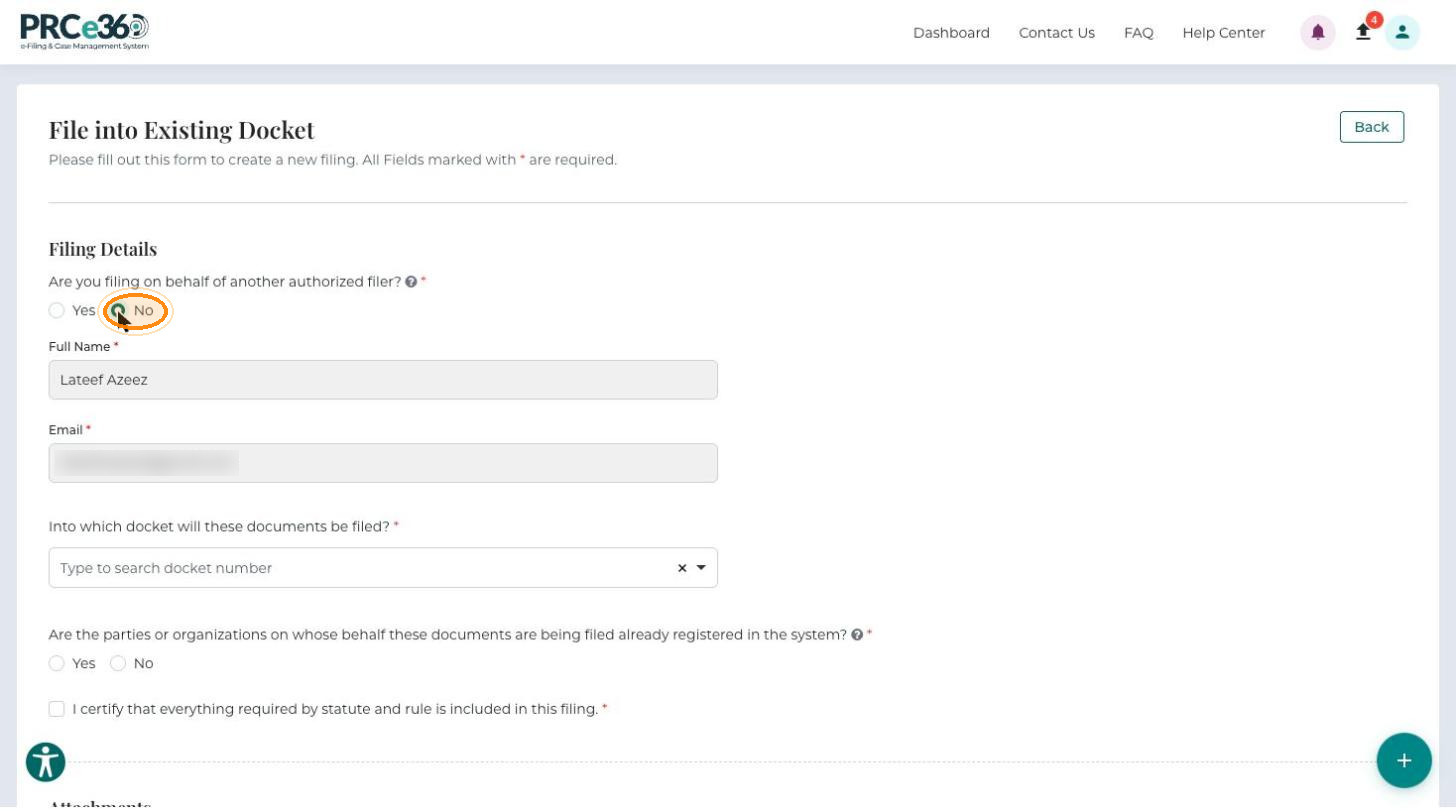
Answer Are you filing on behalf of another authorized filer?*
-
Yes: enter the authorized filer's First Name*, Last Name* and Email*.
-
No: your Full Name and Email are filled in from your profile.
-
-
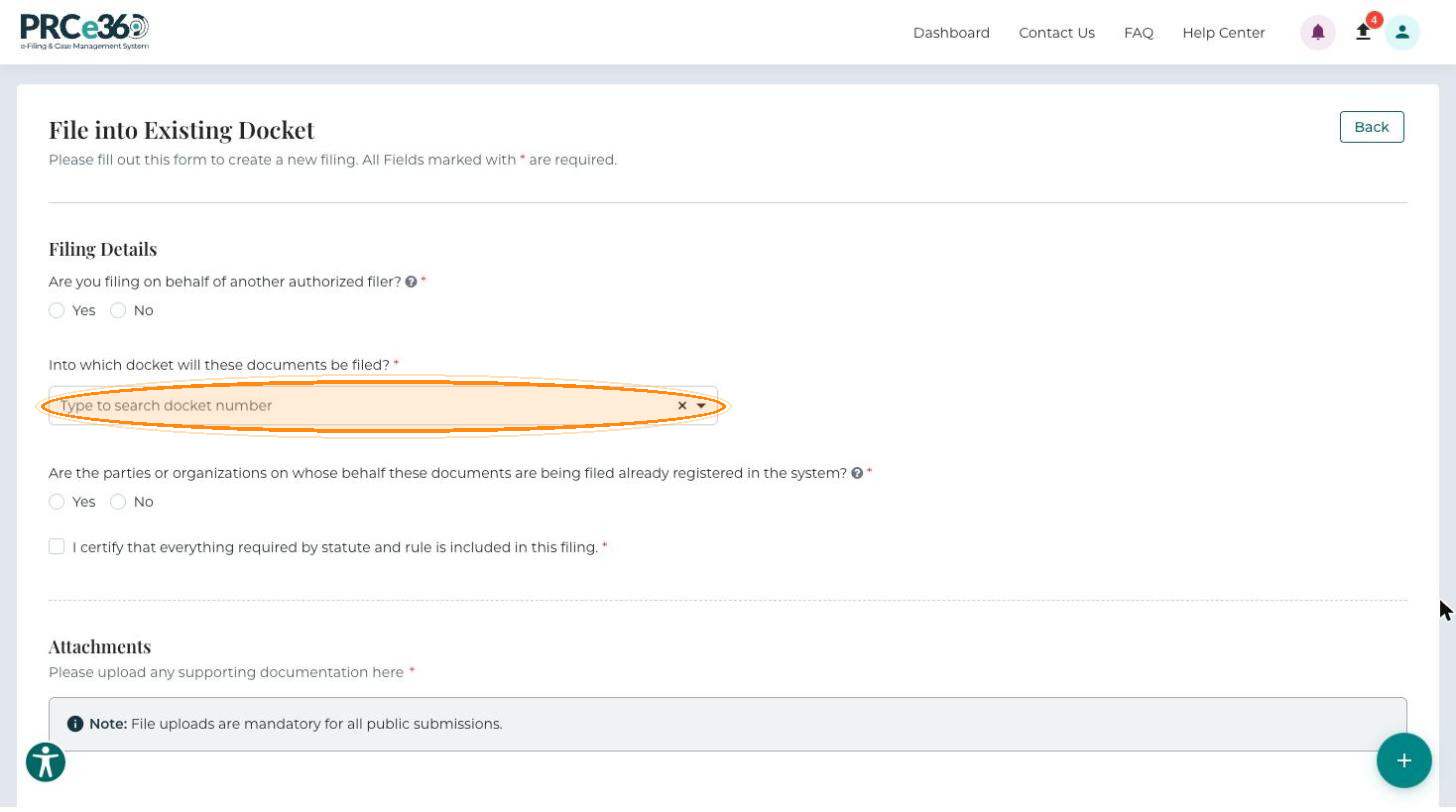
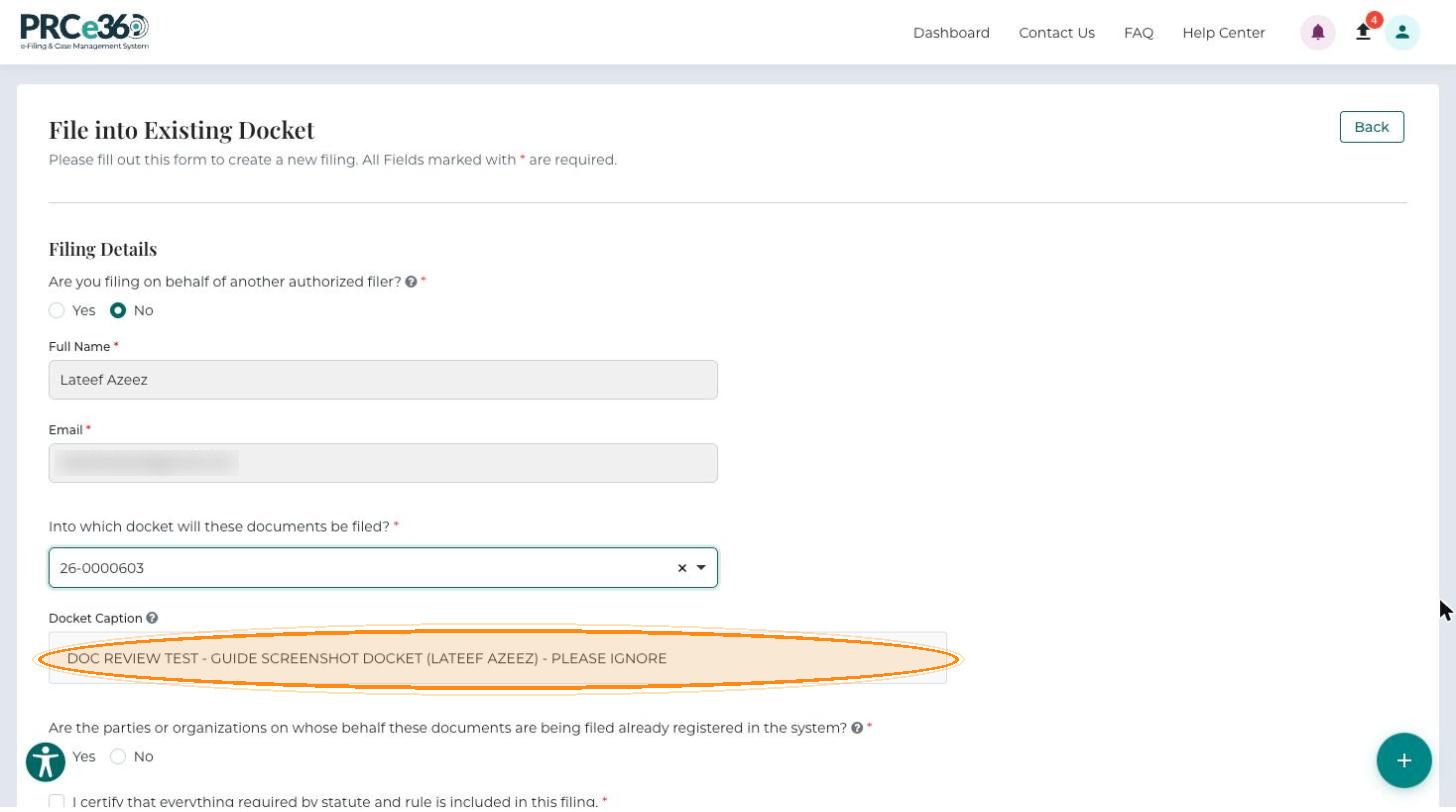
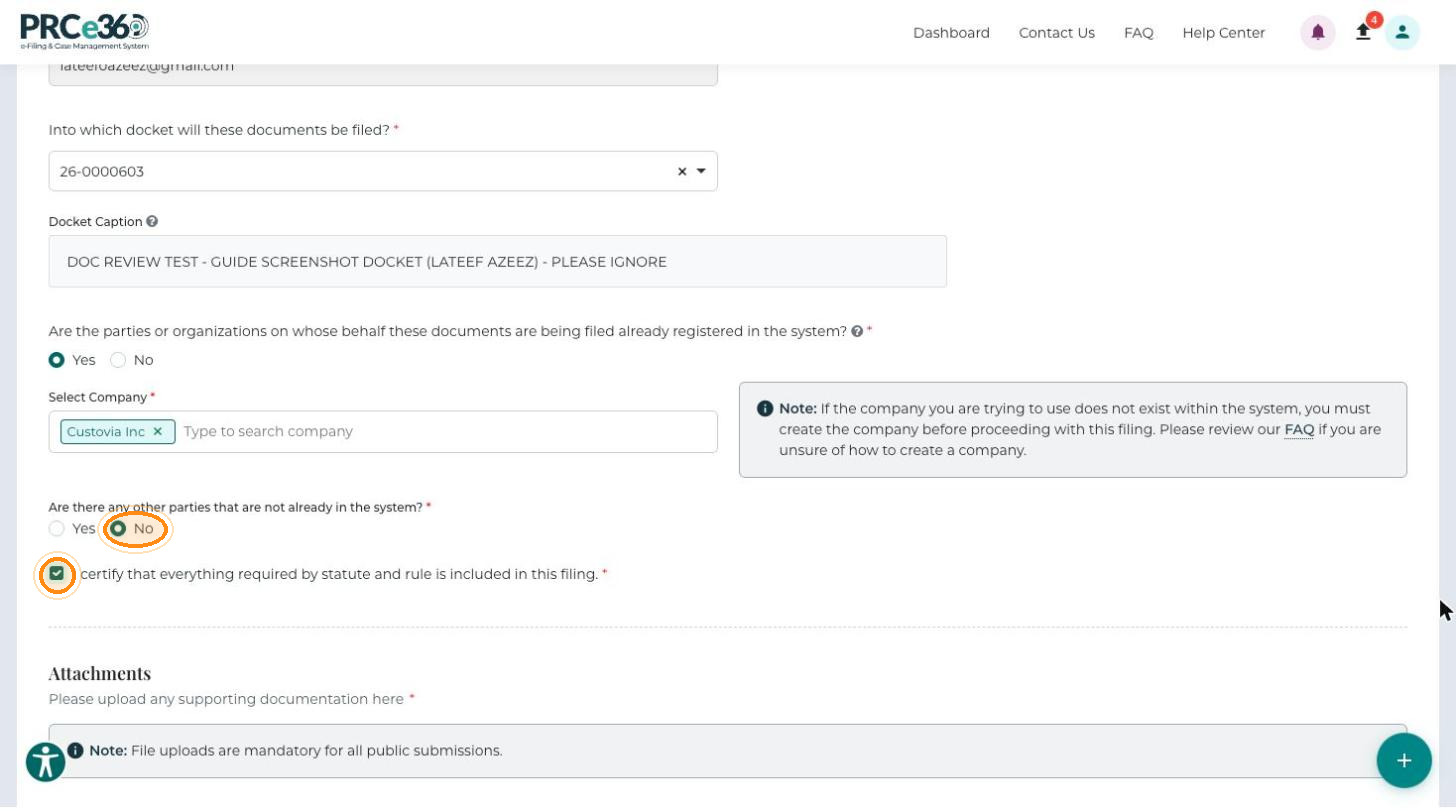
In Into which docket will these documents be filed?*, type the docket number and select the docket from the list.
The Docket Caption of the selected docket is shown below the field.
-
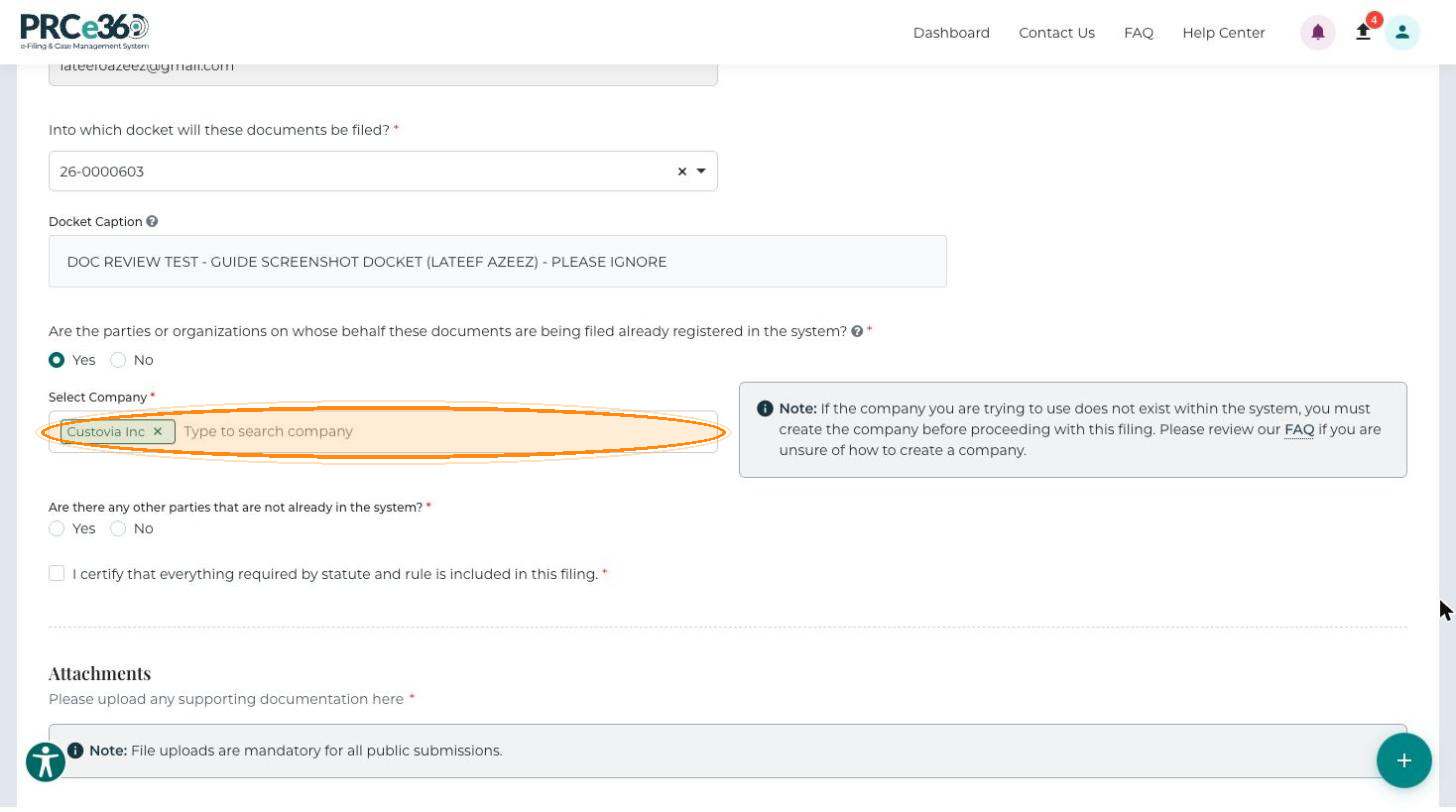
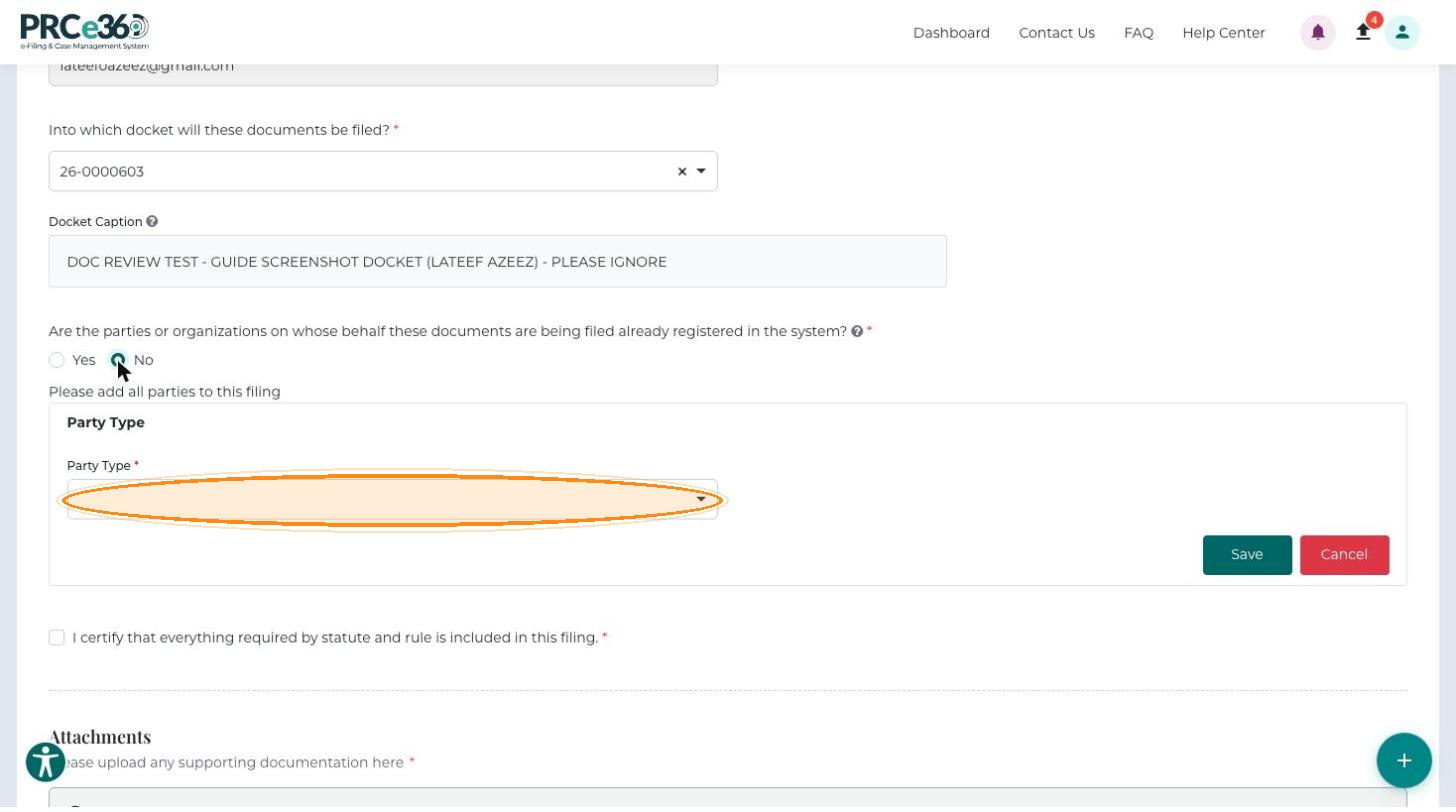
Answer Are the parties or organizations on whose behalf these documents are being filed already registered in the system?*
-
Yes: a Select Company* search field appears. Type the company name and select it. If the company does not exist in the system, you must create it before you continue (see Register a New Company).
-
No: add all parties to the filing. Choose the Party Type* (Company / Organization or Individual), enter the party's details (for an individual, the First Name and Last Name) and click Save.
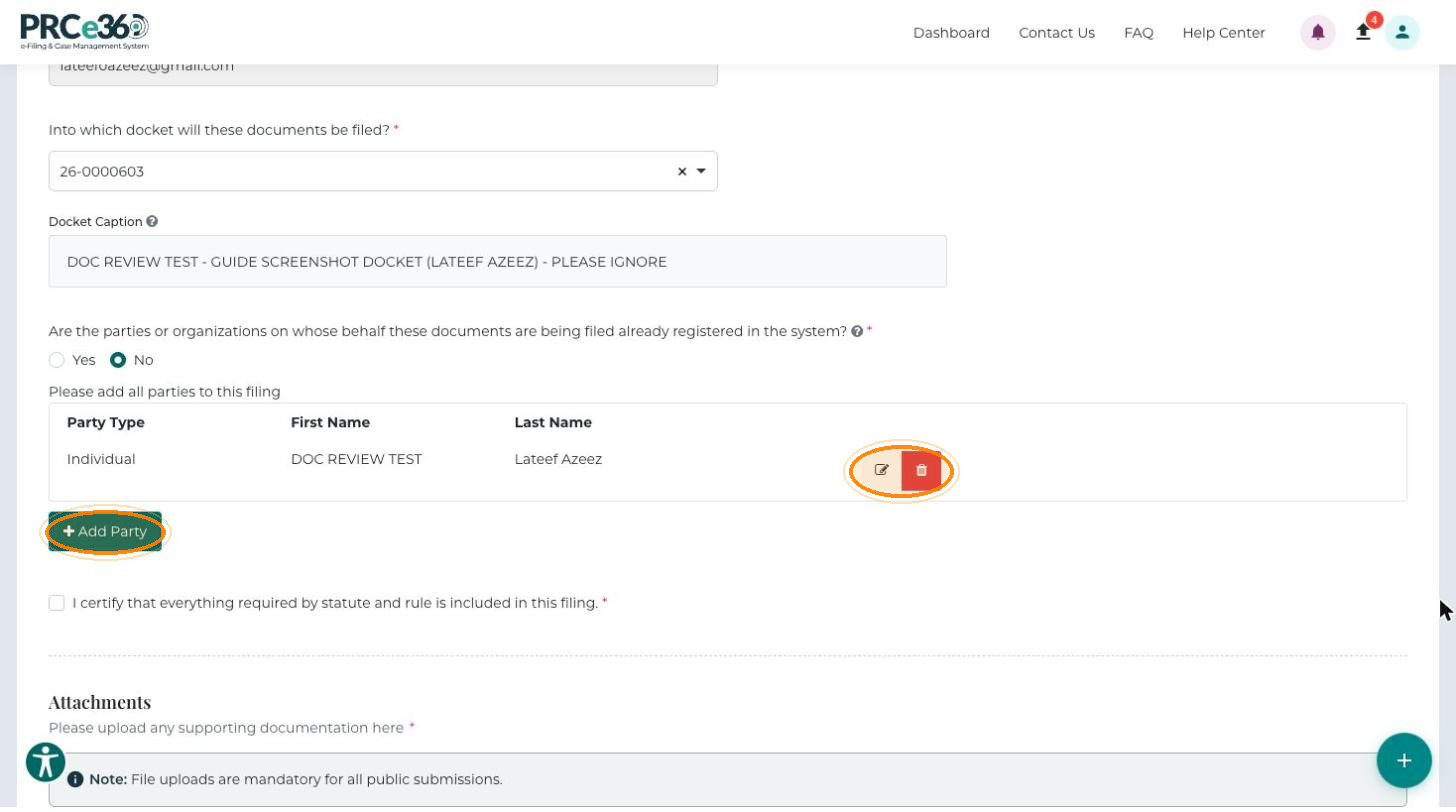
Each saved party is listed with its Party Type, First Name and Last Name, with buttons to edit or delete it. If there is more than one party, click + Add Party to add the next one.
-
-
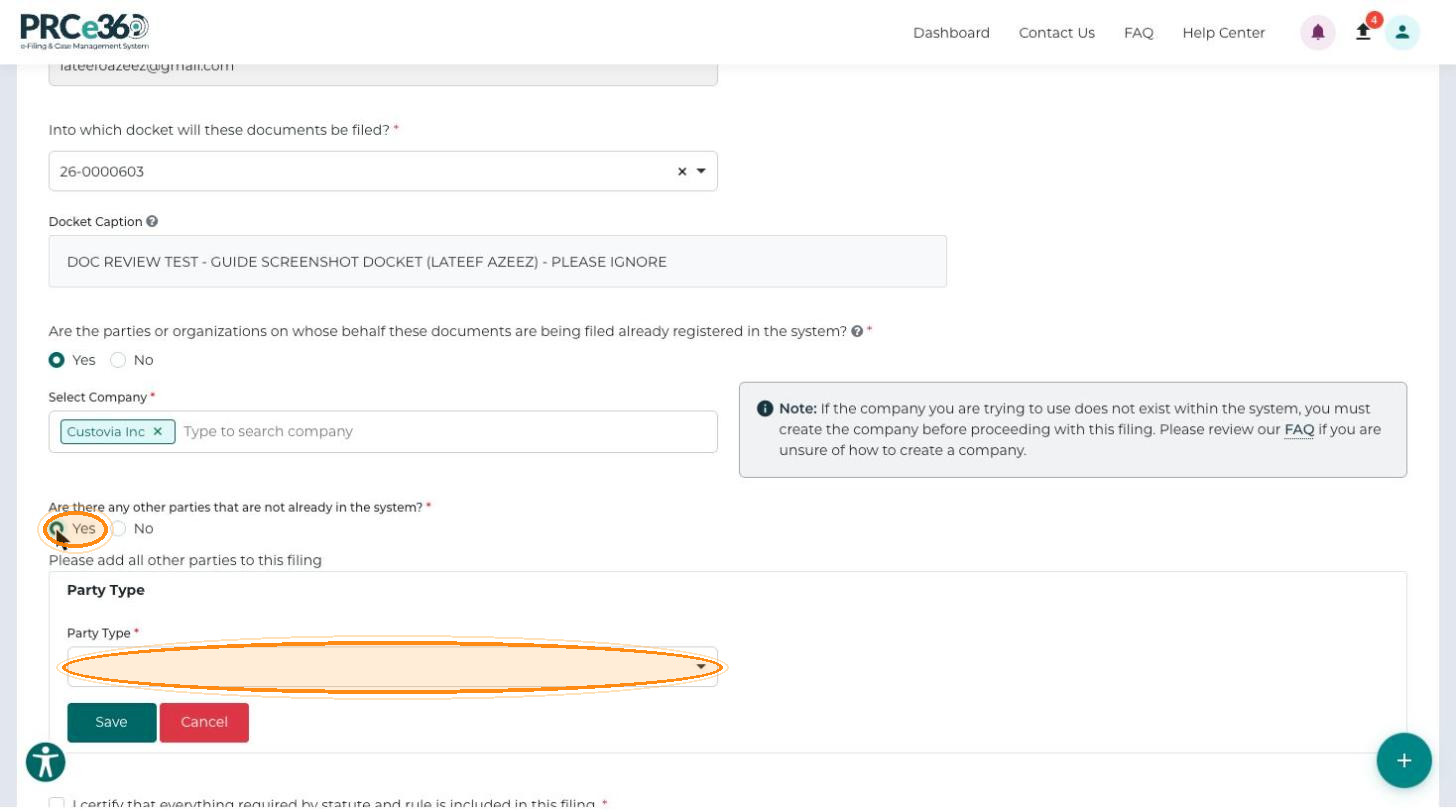
If you answered Yes in step 3, answer Are there any other parties that are not already in the system?*
-
Yes: add the other parties with Party Type* and Save, as above.
-
No: continue with the form.
-
-
Select I certify that everything required by statute and rule is included in this filing.*
Upload Documents
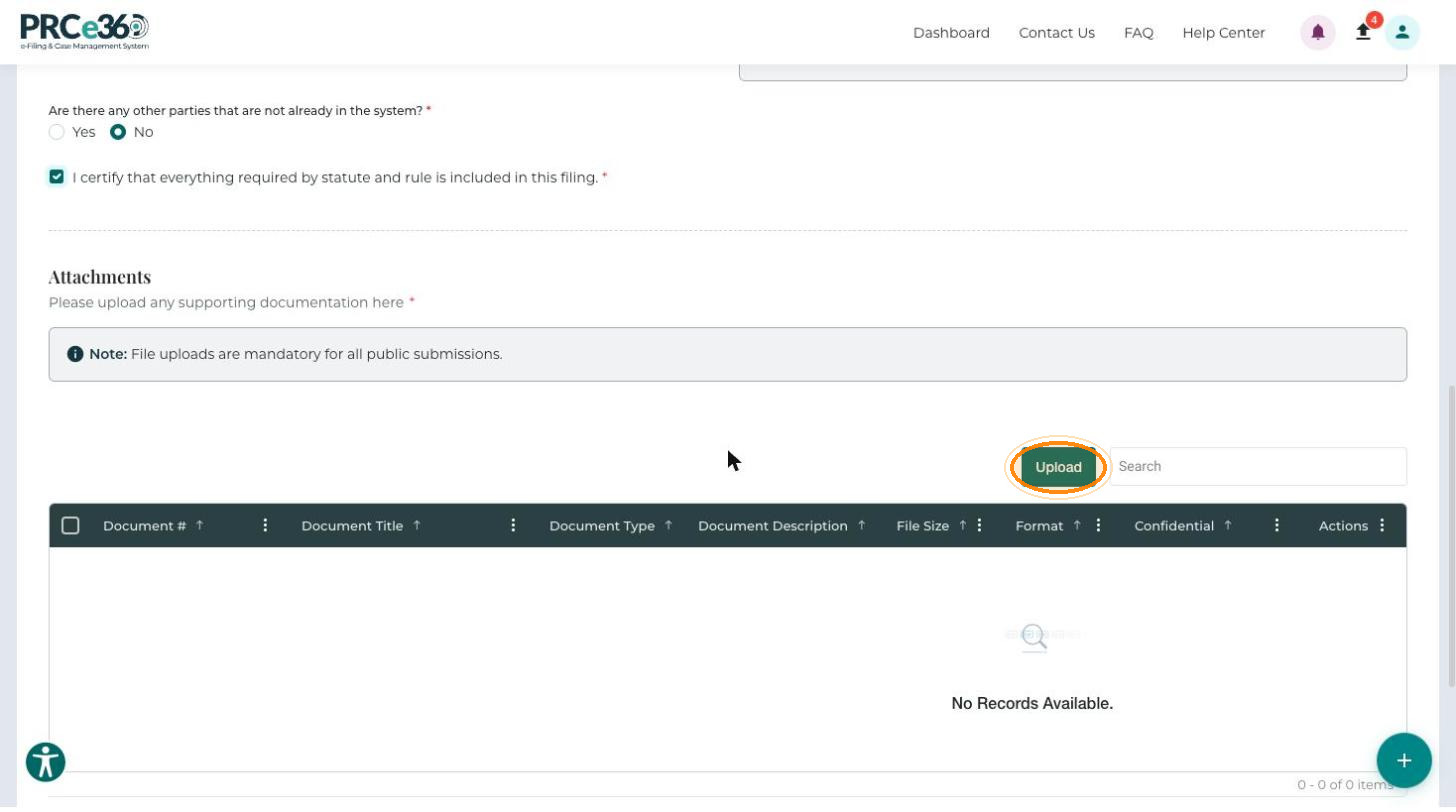
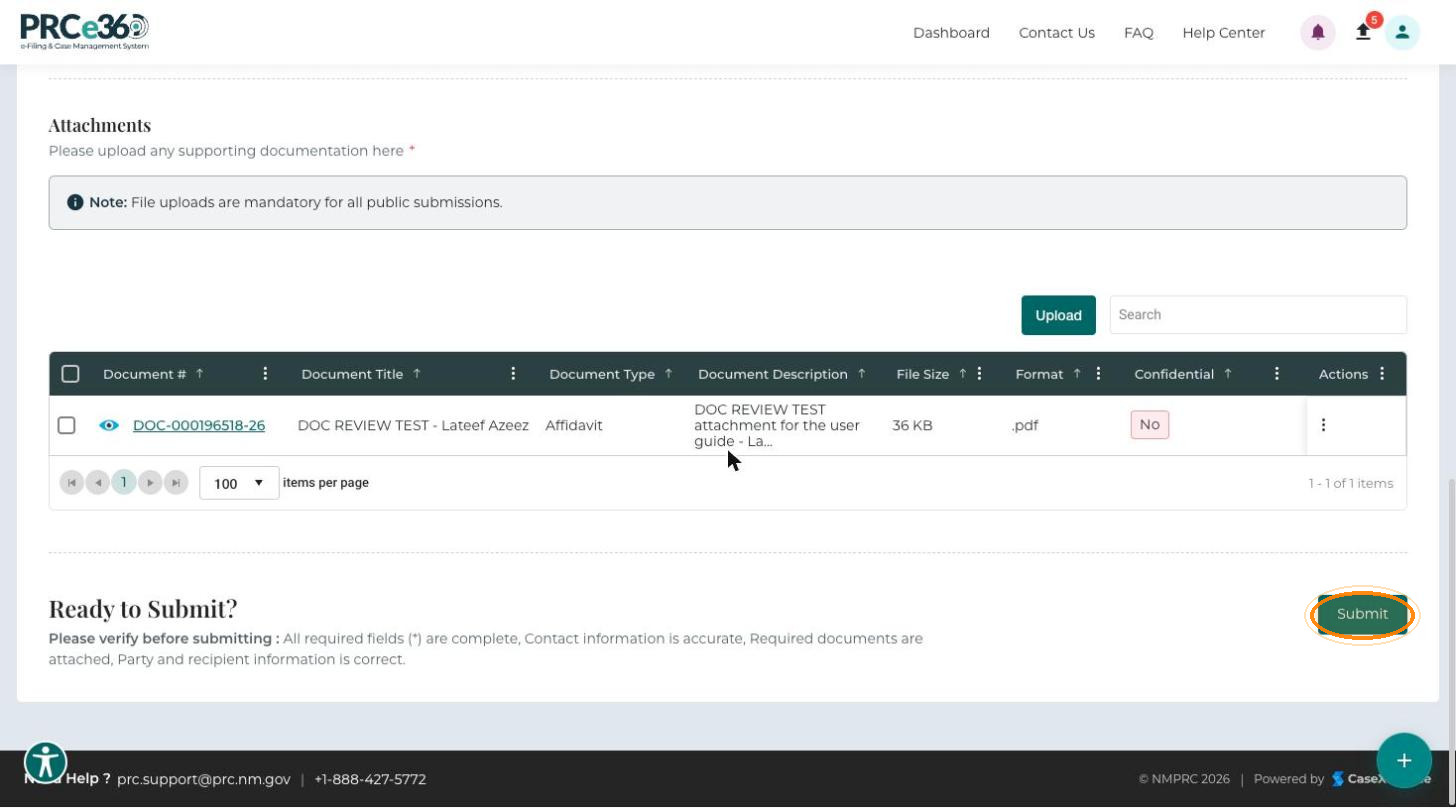
File uploads are mandatory for all public submissions.
-
Under Attachments, click Upload.
-
In the Upload Document pop-up, enter the Document Title*.
-
Choose the Document Type*.
-
Choose the Access Type*: Non-Confidential (the default) or Confidential.
-
Optionally enter a Description.
-
Click Select file or drop the file into the box.
-
Click Save to add the document to the grid, or Cancel to close the pop-up without saving.
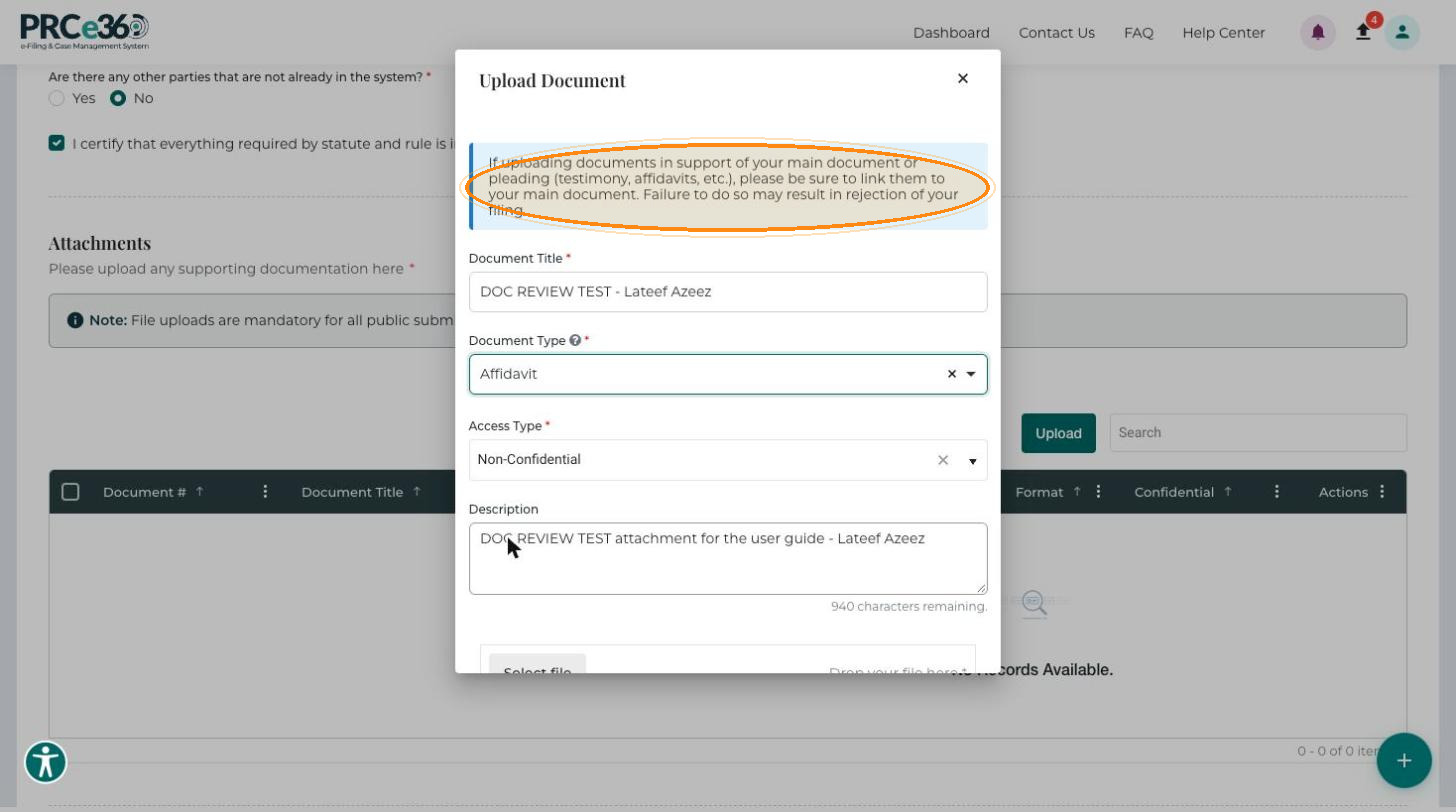
If you upload documents in support of your main document or pleading (testimony, affidavits and so on), link them to your main document. Failure to do so may result in rejection of your filing.
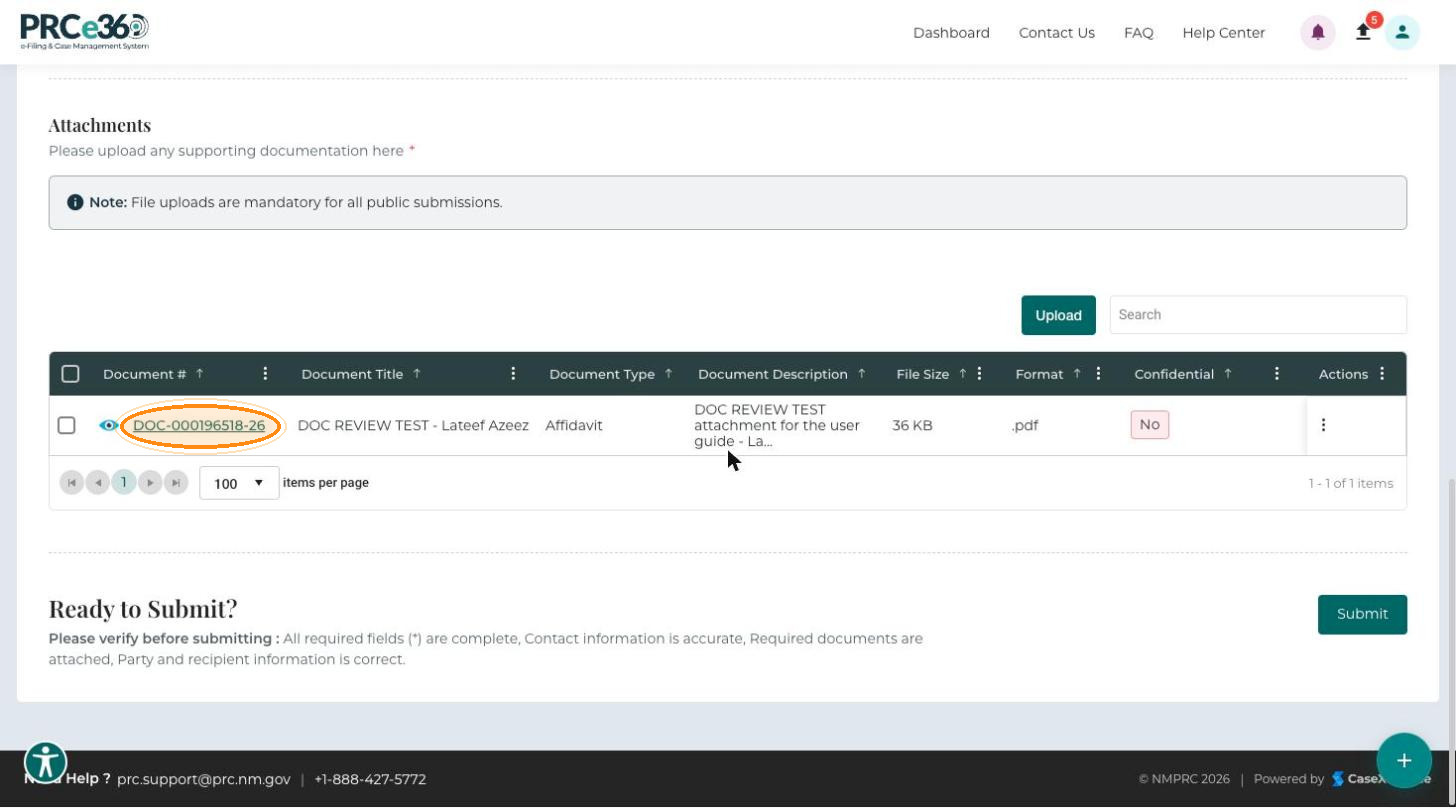
Uploaded documents appear in the Attachments grid:
| Column | Description |
|---|---|
| Document # | Unique document number. Click it to open the document viewer. |
| Document Title | The name you gave the document. |
| Document Type | The classification, for example Advice Notice, Affidavits, Applications or Briefs. |
| Document Description | A short description of the contents. |
| File Size | The size of the file. |
| Format | The file type, for example .pdf or .docx. |
| Confidential | Whether the file is confidential. |
| Actions | The ⋮ menu, with Link and Delete. Link associates the document with your main document. |
Submit the Filing
-
Check that all required fields are complete and your documents are uploaded.
-
Click Submit.
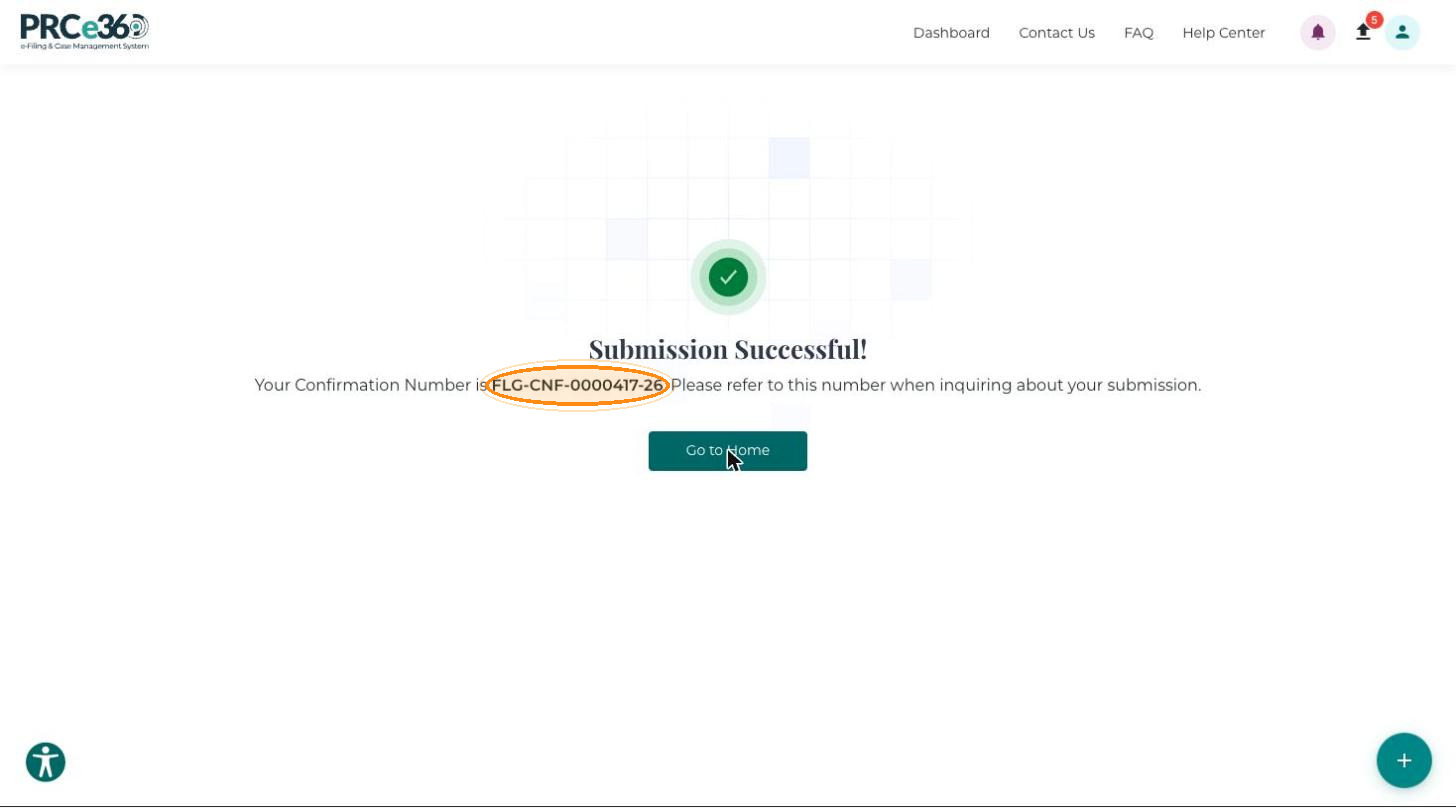
Submission Successful! appears with your Confirmation Number, for example FLG-CNF-0000001-26. Refer to this number when you ask about your submission. Click Go to Home to return to the dashboard.
Track the Filing
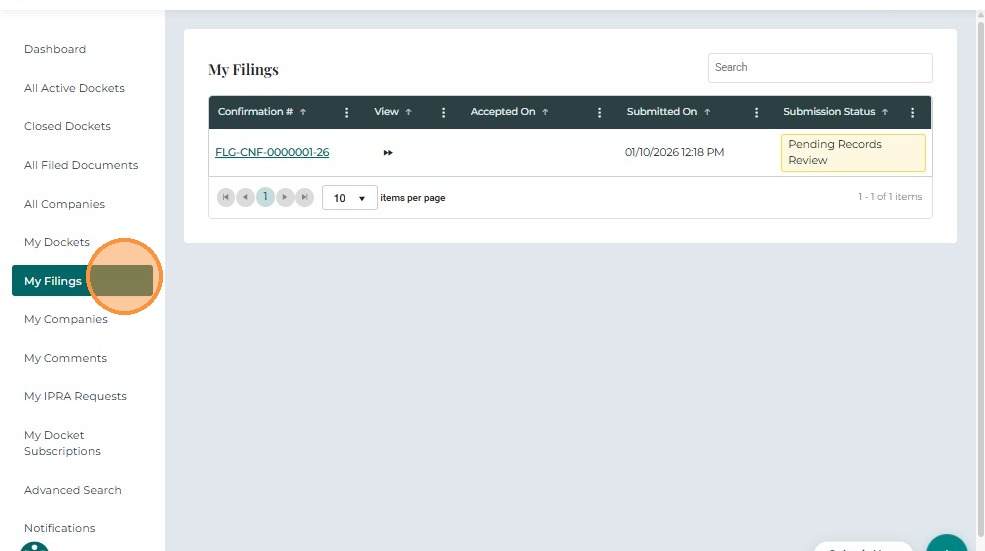
Select My Docket Filings in the left-hand menu to see your filings.
- Confirmation #
- View
- Accepted On
- Submitted On
- Submission Status
A new filing shows the status Pending Records Review. Once the filing is accepted, the status changes to Accepted.